Tempering chocolate can be intimidating due to its precise temperature requirements and fear of ruining your chocolate creations. However, mastering this skill is essential for chocolate lovers and home chocolate makers. Properly tempered chocolate has a smooth, glossy finish and is more stable at room temperature, making it easier to work with for all of your chocolate projects.
Learning to temper chocolate allows home chefs, makers and bakers to create professional-quality treats, enhancing the overall appearance of their desserts. In this blog post, we’ll provide you with the essential basics of chocolate tempering—the 101 guide to tempering chocolate at home.
Introduction to chocolate tempering
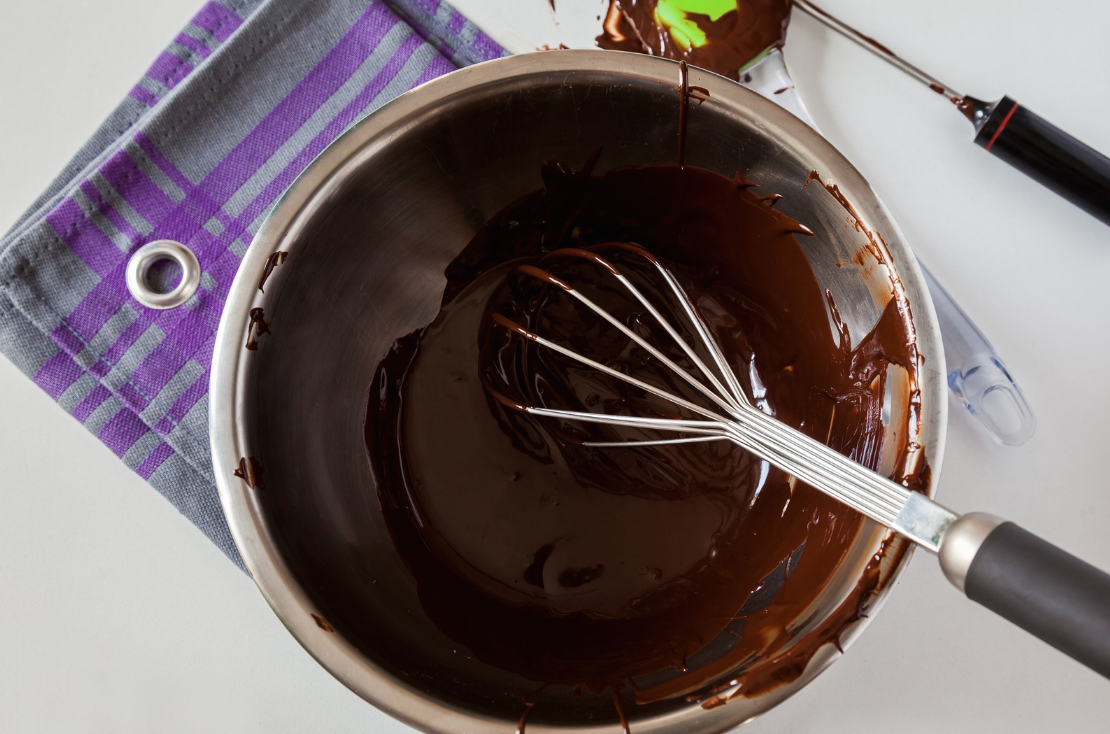
Tempering chocolate is a controlled heating and cooling process that forms microscopic cocoa butter crystals within the melted chocolate. These crystals, when properly set, give the chocolate its desired texture, glossy appearance, and satisfying snap. While it may seem straightforward based on a quick scan of the instructions, tempering involves precise steps of melting, cooling, and reheating the chocolate while constantly stirring or agitating it.
Despite its simplicity in cookbook instructions, tempering is a complex process requiring careful molecular manipulation. Given that everything is happening on a molecular level, you can’t see the changes to know if you are doing it right. Accuracy is crucial to ensure the chocolate achieves the perfect temper, resulting in its ideal texture and appearance.
No matter which method you use to temper chocolate, the process follows the same steps. First, melt the chocolate to a temperature that melts all the different types of cocoa butter (fat) crystals. Next, cool the chocolate while stirring, often adding some tempered chocolate which is already in the desired crystal form to encourage additional crystal formation. Then, there is sometimes a final re-heat to melt away any crystals that are not the desired form. Once the chocolate reaches the final “working” temperature, you can use it to line molds, pour bars, or dip strawberries. The chocolate will then need to sit and set at room temperature or below. If the chocolate is properly tempered, it will set in a matter of minutes. While the chocolate will be solid after this initial set, complete crystallization will take about 12-24 hours.
It’s important to understand that the target temperatures for each of the tempering steps depends on the type of chocolate that you are working with, dark, milk or white chocolate, so be aware of the differences.
Why is tempering important for chocolate quality?
Tempering chocolate is essential for achieving the ideal appearance, texture, and durability of your chocolate creations.
- Appearance: Properly tempered chocolate has a glossy, shiny look that makes it more visually appealing and professional looking.
- Texture: Tempered chocolate has a smooth, firm texture and makes a satisfying snap when broken. This sets it apart from untempered chocolate, which can feel soft or grainy.
- Stability: Tempered chocolate stays stable at room temperature and doesn’t melt easily on your fingers, making it easier to handle and share with others.
- Shelf Life: Proper tempering prevents the fat from rising to the surface and forming white streaks, called bloom. This keeps the chocolate looking fresh and tasting good for a longer time.
Chocolate tempering methods
There are three main methods of tempering chocolate at home: seed tempering, table tempering and machine tempering. We will review each and you can decide which of the three tempering options is best for your needs.
Seeding Method:
Seed tempering chocolate is a basic technique that can be used when you are starting with tempered chocolate but need to melt it for use in another form (molding, coating strawberries, coating, etc.). If you are not starting with tempered chocolate (most of what you buy in the store is already tempered), this technique will not work and you will need to table temper.
Equipment:
- Chocolate (tempered)
- Metal or glass bowl
- Rubber spatula
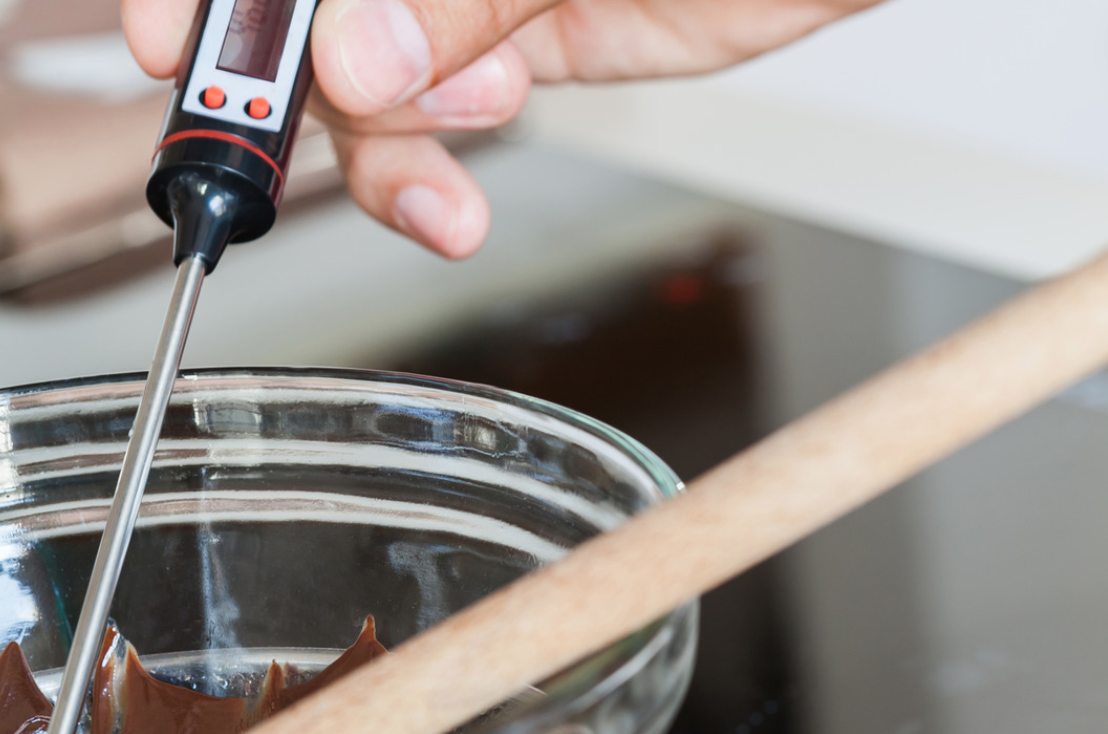
- Thermometer
It’s important to know that the target temperatures for the seed tempering method vary depending on whether you’re working with dark, milk, or white chocolate.
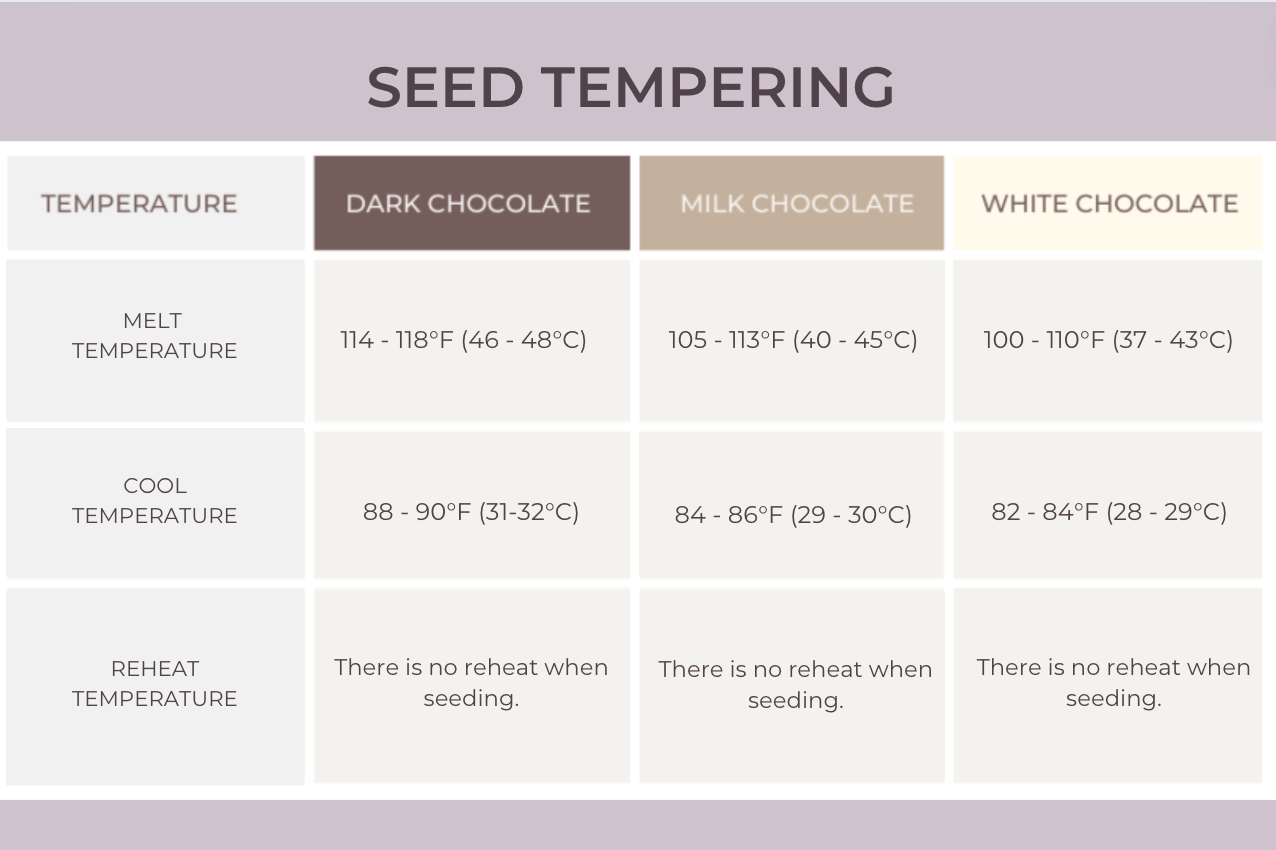
- Melt: Chop and melt two-thirds of your chocolate until it hits the Melt target temperature for the chocolate you are using. If you overshoot the target temperature, simply stir and cool the chocolate until it reaches the target again.
- Cool: Add the remaining one-third of finely chopped chocolate to the melted chocolate, stirring continuously until the temperature drops to the Cool target temperature. Your chocolate is now ready to use.
- Reheat: If you don’t use all the chocolate quickly or the temperature drops more than a couple degrees below the working range, you may have to gently warm your chocolate to bring it back to temperature. Otherwise, there is no need for a final reheat step using this method.
Important: Chocolate and water don’t mix. If you are using a water bath or bain-marie to melt your chocolate, be careful not to let any water drip into the chocolate. Even a couple drops can cause your chocolate to seize and ruin it for good.
Microwave Seeding Method:
This is a variation of the seed tempering method that uses a microwave rather than a hot water or steam bath. For those with a microwave, this technique is the simplest method if you are starting with tempered chocolate (most chocolate you buy in the store is tempered).
- Chop the chocolate into small pieces.
- Place ⅔ of the chocolate in a dry, microwave-safe bowl.
- Put the bowl in the microwave and microwave for 15-second intervals.
- Stir the chocolate with a spatula after each 15-second blast until all of the chocolate is just melted (do not overheat the chocolate as it can burn).
- The chocolate should be at or just below the Melt temperature. Pour in the remaining chopped chocolate and stir until all the pieces have melted.
- Your chocolate should now be near the Cool temperature, tempered and ready to use.
Seeding with Cocoa Butter Silk
Another variation on the seeding method is to temper using cocoa butter silk. Cocoa butter silk is a special kind of pre-tempered cocoa butter that simplifies the tempering process and reduces the chances of errors. By using cocoa butter silk, you can achieve perfectly tempered chocolate with ease.
Cocoa butter silk is essentially a solid or soft paste made of 100% cocoa butter that is in tempered form (Form V). When added to melted, untempered chocolate, it seeds the chocolate and helps the chocolate form the right crystals. This method is an easy way to seed your chocolate without needing to precisely control temperatures. For tempering dark chocolate, add the silk when the temperature hits 94°F.
Adding 1-2% of the chocolate’s weight in cocoa butter silk is enough to properly seed the chocolate. The only downside is that some people don’t want added cocoa butter in their chocolate recipe, but if that’s not an issue, cocoa butter silk is a great way to go. Learn more about cocoa butter silk.
Tabling Method:
Table tempering chocolate is a skill that takes time to develop. If you have a desire to learn how to table temper, it’s probably best to find a dedicated time to practicing the technique before you actually need to temper chocolate for an important project. Tabling is particularly useful when you aren’t starting with tempered chocolate. This method is a form of “wild crystallization” where the seed crystals are being generated from scratch, rather than being added from seed chocolate.
A summary of table tempering is below; if you want a more detailed explanation of the technique, you can find the information on our post about how to table temper chocolate.
Equipment:
- Chocolate (tempered or untempered)
- Metal or glass bowl
- Two bench scrapers or spatulas
- Thermometer (contactless IR is best)
- Stone working surface
Again, keep in mind that the target temperatures for the table tempering method vary depending on whether you’re working with dark, milk, or white chocolate.
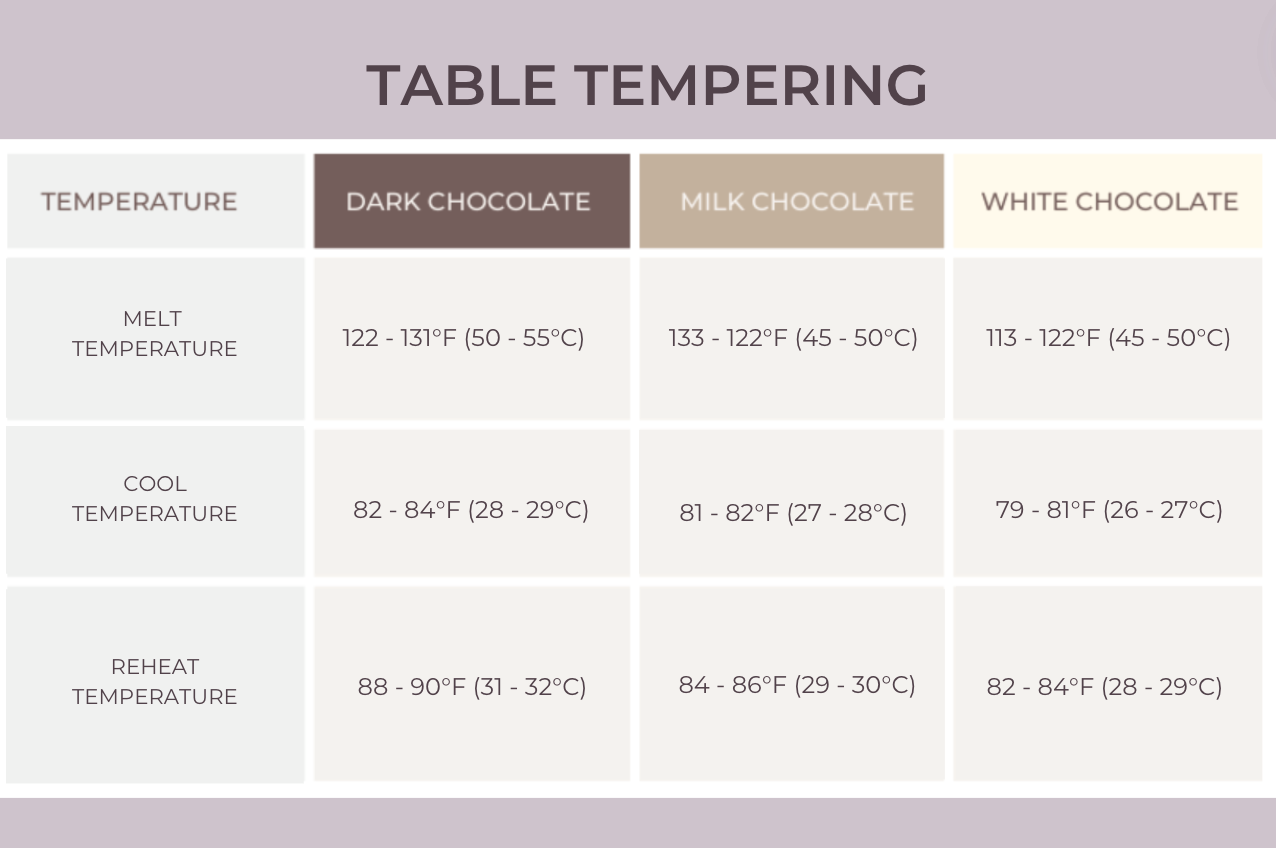
- Melt: Heat the chocolate until it reaches the Melt temperature range. If you overshoot slightly, it’s not an issue with this method (just be sure that you don’t burn your chocolate).
- Cool: Pour two-thirds of the melted chocolate onto a cool, flat surface, like marble. Use a spatula or scraper to spread it out evenly, continuously moving it around until it cools to 82-84°F for dark chocolate, 81-82°F for milk chocolate, and 79-81°F for white chocolate.
- Reheat: Collect the chocolate from the slab and mix it into the remaining warm chocolate in your bowl. The combined temperature should reach 88-90°F for dark chocolate, 84-86°F for milk chocolate, and 82-84°F for white chocolate.
If you don’t have a large stone slab to work on (or just don’t want the mess), you can try this same technique in metal or glass bowls. Heat the chocolate and then pour two-thirds of the melted chocolate into a separate bowl to stir and cool. Re-combine the chocolate and stir until it reaches the Reheat temperature.
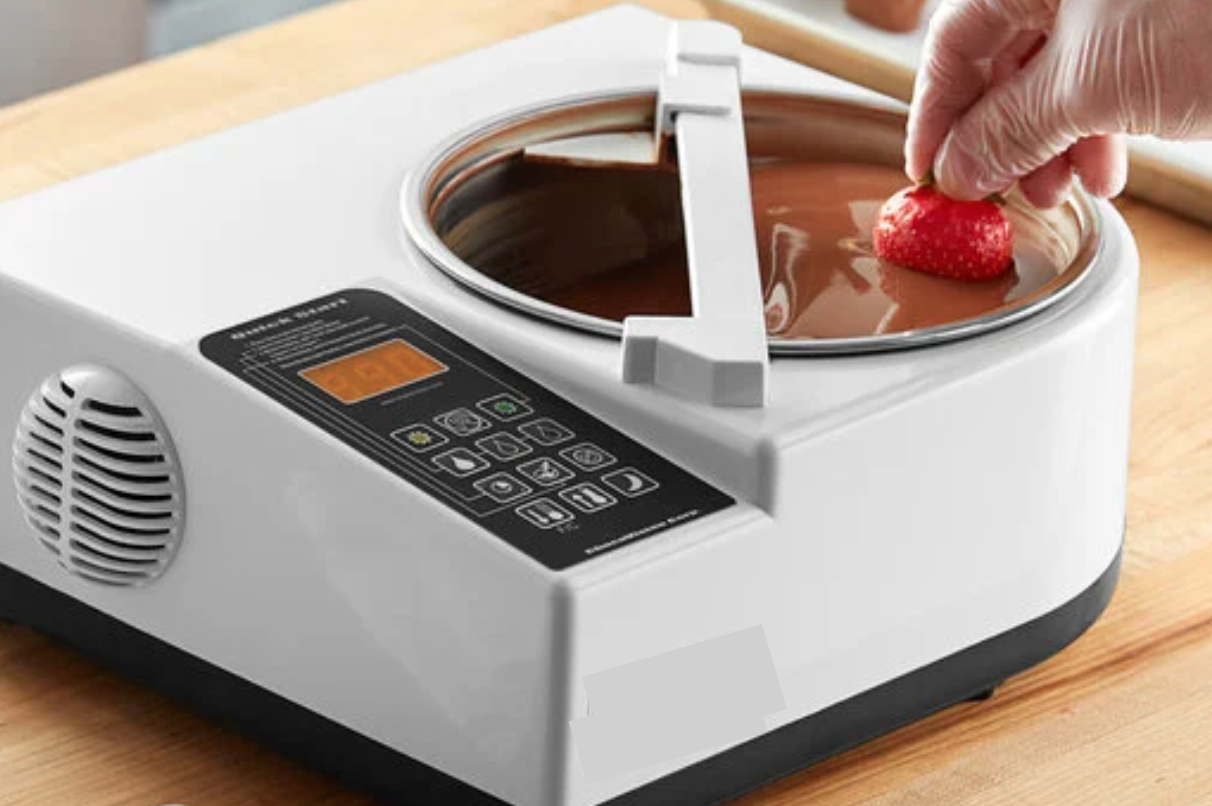
Tempering Machine:
There are home tempering machines that automate the process of melting, cooling, and reheating for you. These machines assume that you are starting with tempered chocolate since they rely on the seeding method. Simply add your chocolate, set the chocolate type, and let the machine do the work.
If your starting chocolate is not already tempered, it is possible to use a tempering machine to perform a “wild crystallization” but you will have to manually set the target temperatures and dwell times.
Sous Vide Tempering
Sous vide chocolate tempering is a method that uses the precise temperature control of a sous vide machine to achieve perfectly tempered chocolate.
Ingredients and equipment
- Sous vide machine
- Large pot
- Chocolate (untempered)
- Resealable plastic bag or vacuum-seal bag
Method:
- Fill a large pot or container with water and set up your sous vide machine.
- Preheat the water bath to the target temperature for your type of chocolate: Dark chocolate: 115°F, Milk chocolate: 105°F , White chocolate: 100°F.
- Finely chop the chocolate to ensure even melting.
- Place the chopped chocolate in a resealable plastic bag or vacuum-seal bag. Make sure to remove as much air as possible from the bag.
- Submerge the bag in the preheated sous vide bath. You may need to weigh it down so it stays submerged.
- Allow the chocolate to melt completely, around 10-15 minutes.
- Once the chocolate has melted, reduce the sous vide bath temperature to the appropriate tempering temperature: Dark chocolate: 82-84°F , Milk chocolate: 81-82°F, White chocolate: 79-81°F . You can add a little ice to the bath to speed up the cooling process.
- Leave the chocolate in the bath until it cools to the desired tempering temperature. This process can take around 15-20 minutes.
- Increase the sous vide bath temperature slightly to the working temperature for the chocolate: Dark chocolate: 88-90°F, Milk chocolate: 84-86°F, White chocolate: 82-84°F.
- As the chocolate is slowly warming, take the bag out of the sous vide every few minutes and squeeze the chocolate in the bag to agitate it and help with crystal formation.
- Keep the chocolate at this temperature until you are ready to use it.
By following these steps, you can easily achieve perfectly tempered chocolate using the precise temperature control of a sous vide machine.
How to test your chocolate temper?
We have a simple tip about how to check if your chocolate is properly tempered. It is important to test your chocolate before you go through the effort of using it in your creations. There’s nothing more frustrating than having to melt down all your hard work and start over. Here are two options:
Option One: Grab a piece of foil or parchment paper and scoop a teaspoon of chocolate onto it. Place it in the fridge for a few minutes until the chocolate sets. When you remove it, let it sit at room temperature for a few minutes then check the chocolate’s appearance and texture.
Option Two: Quickly dip the backside of a metal spoon into your chocolate. It should leave a thin coating. Place the spoon in the fridge for a few minutes (dipping the back side allows you to rest the spoon upside down without creating a chocolate mess in your fridge). Remove the spoon from the fridge and let it rest at room temperature for a couple minutes.
Properly tempered chocolate will have a smooth and glossy surface with a firm texture. It won’t melt or get soft after you take it out of the fridge. You can also break it apart and listen for the satisfying snap of tempered chocolate. If you see some streaks or spots in your chocolate (called bloom) or if the surface is dull or the chocolate does not stay solid, then your chocolate is not in temper. You’ll need to try your temper process again.
Tips for Successful Chocolate Tempering
- Use high-quality chocolate.
- Keep equipment dry.
- Use a thermometer.
- Choose the right method.
- Perform a temper test to check if the chocolate is properly tempered.
- Keep the chocolate at the correct temperature while working with it to prevent it from losing temper.
- Tempering chocolate takes practice, so be patient and keep trying until you get it right.
Common Mistakes in Chocolate Tempering
- Overheating chocolate by heating it too quickly or to too high a temperature can cause it to burn or lose its temper.
- Even small amounts of moisture can cause chocolate to seize, so ensure all utensils and equipment are completely dry.
- Failure to melt the chocolate completely can result in uneven tempering and undesirable texture, while fluctuations in temperature during the tempering process can lead to uneven crystal formation and poor results.
- Cooling the chocolate too quickly or too slowly can affect the formation of stable crystals, resulting in a grainy texture. Cooling at a rate of 2°F per minute is ideal.
- Insufficient stirring can lead to uneven formation or distribution of crystals and inconsistent tempering. Make sure you are constantly wiping down the sides of the bowl since simple stirring at the center is not sufficient.
- Using the wrong type of bowl or utensils can affect the tempering process, so it’s important to use equipment specifically designed for chocolate work.
- High humidity can affect the tempering process and lead to bloom, so always consider humidity levels when tempering chocolate.
- Added ingredients can also change the tempering characteristics of your chocolate. For example, chocolate sweetened with honey or chocolate flavored with brown butter can change the temper parameters.
We hope this tempering information was helpful and that you find success in elevating your craft.
For more great articles and recipes, check out the rest of our CocoTerra blog.
If you have any questions or comments, feel free to contact us through our social media channels. We are @cocoterra_co on Instagram and Pinterest and @cocoterraco on X (aka Twitter) and Facebook.
")